There's nothing like the thrill of a live music concert. But creating that experience for your audience starts with ticketing: getting people in the door and making sure they have something memorable to take home from their night at your show.
But navigating through endless spreadsheets, dealing with ticket vendors or manually entering information can be a huge time sink.
So how do you make the ticketing process more efficient?
Well, stress no more, as the solution lies in learning how to make your own concert tickets.
Creating your own personalized tickets not only puts you in total control, but also adds an element of uniqueness to your concert.
This comprehensive guide will take you through every step of making bespoke concert tickets, eliminating any ticket-related stressful scenarios and ensuring a smooth, enjoyable event for everyone involved.
Let's get started.
A. How to generate concert tickets with a concert ticket app
To create QR Code-based concert tickets, you need an online professional tool such as Ticket Generator, which acts as an efficient concert generator. This tool creates QR Code-based tickets, allowing you to effectively make your own concert tickets.
Upon scanning, you can know whether the ticket is valid or not. Using this tool for demo purposes, let's look at how to leverage this easy-to-use concert ticket app:

1. Create event
Go to Ticket Generator and sign up to create an account. Note that you get ten free credits to create ten tickets free of cost.
Once logged in, go to Create Event. Here, select the event, if already created. If not, then create an event by adding details such as event description, time zone, and venue.
2. Design tickets
You can choose from the following options:
Upload Own Design: This option allows you to design your ticket using your own ready-made design template.
With this option, you can superimpose the QR Code and unique ID on the ticket.
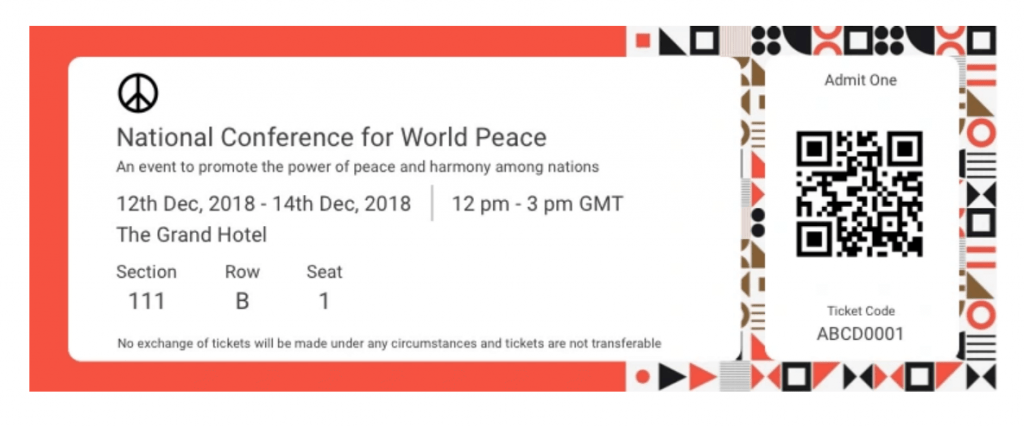
Moreover, it also allows you to add variable information (which would be different for each ticket) by clicking on the + button. It could be the guest's name, row number, seat number, etc.
Here's an example of a ticket created using a readymade template:

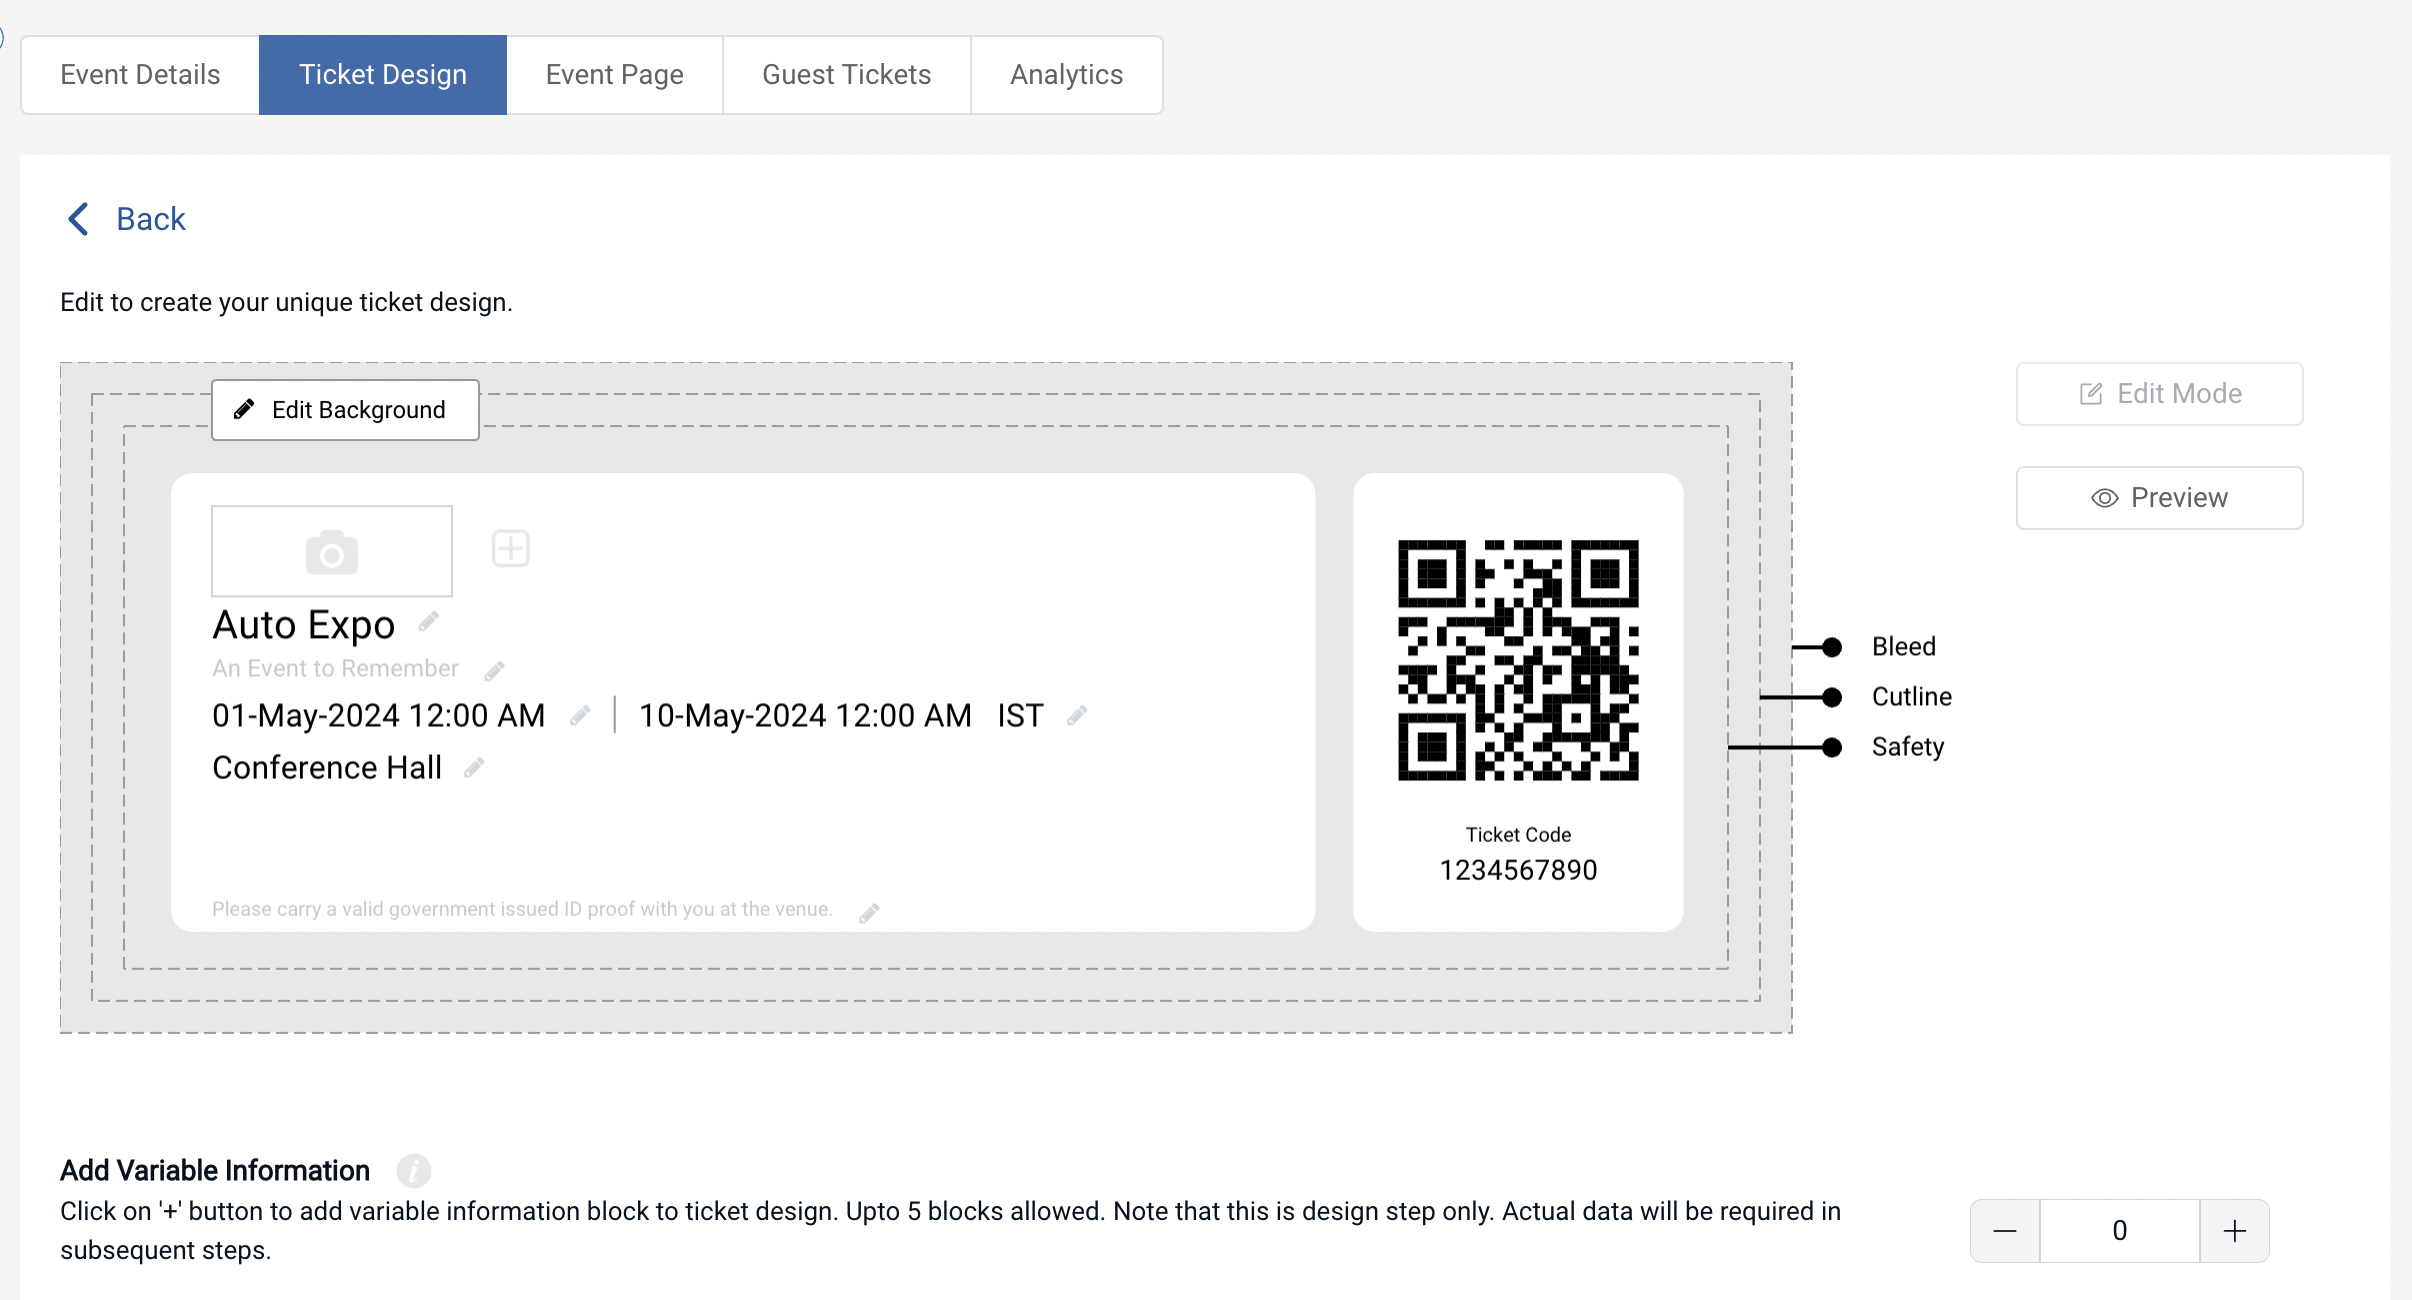
Edit Design: Here, you can use the Ticket Generator's standard design to create tickets from the scratch. It gives you the option to add a logo, change the background color, or add a background image to your ticket.

Once you've designed your tickets, click on Preview to see how your ticket design looks.
Choose from templates: If you don't want to design the entire ticket but you still want to give it a fancy look, this option is right for you. Simply click on Choose from templates option to access this feature.
Once clicked, you will see a number of pre designed templates to choose from. To select a template click on Select Template button right below the chosen template and that's it, your ticket, with all the information, will turn into a designer ticke
For more information, you can refer to this detailed guide on how to design event tickets.
Once designed, you can click on Preview. Here, you can see how your QR Code based ticket looks. If everything looks fine, proceed to the next step.
3. Delivery method
In this option, you can specify how you actually want the tickets. Plus, here you can upload actual data of variable/unique information.
You can choose from the following four options:
i. Generate form link
By clicking this option, you can design and share your own event registration page with your target audience. Here, you can add images, event description, specify the form fields, and even customize the button text.
ii. Generate and Download
By clicking on this option, you can generate and download the tickets in printable formats (PDF).
iii. Generate and send
Here you can choose from the following three options:
a. Send ticket by email only
In this option, you can specify up to 1,000 email addresses. You can either upload a data file or manually type/paste in the given grid. The ticket will automatically be sent to the recipients.
b. Send ticket by SMS only
Here, you can send tickets to your guests via SMS. You can specify up to 1,000 phone numbers.
c. Send ticket by both email and SMS
Here, you can send tickets both by SMS and email to your guests.
You can also add variable information in the data file you are uploading. For your reference, you can refer to this detailed guide on variable information.
iv. Generate via API
You can integrate your registration system with a ticket generation system. And generate tickets programmatically in real-time via Ticket Generator API.
To know more about it, you can refer to this detailed guide on Ticket Generator API.
That' s all. Your QR Code based concert tickets will be generated.
This way, you can easily create printable concert tickets in bulk.
4. Single tickets for contingencies
Here, you can generate and distribute single tickets to the guests. It is useful in two ways:
a. Having unplanned guests at the last moment
Say you are organizing a business event and have created the tickets for all the attendees. But at the last moment, some unplanned guests have walked down on your dance show. And they want tickets for it.
Now rather than generating a whole batch of tickets again, you can simply create additional tickets quickly. Here's how:
i. Login to Ticket Generator
ii. From the dashboard, click on the event for which you want to create these tickets.
iii. Now, click on Guest Tickets tab.
iv. Here, click on New Ticket(s) drop-down and select the Single Ticket option select the delivery method Download Ticket and Send Ticket as per your choice.

Download Ticket: This option allows you to generate and download the ticket.
Send Ticket: This option helps you send the ticket to the guest via email ID or phone number.
v. Once selected, click Generate & Download (in case of Download Ticket) or click Generate & Send (in case of Send Ticket)
That's it. A new single ticket will be generated.
b. Resending the tickets
Say you have sent the tickets of your events to your guests via email and phone number but some of them didn' t receive them. Here again, Ticket Generator can help you resend them. Here' s how:
i. Login to Ticket Generator
ii. From the dashboard, click on the event for which you want to resend the tickets.
iii. Now, click on Guest Tickets tab.
iv. Click on Resend Ticket.

v. Now, you'll have to specify your preferred mode of searching for the guest's ticket. You can use the ticket ID to do it. Alternatively, you can also use the guest's email address or phone number which you entered while creating the tickets
vi. Once you've entered these details, click Search. Now, you will see the ticket details
vii. Click on View and you'll be asked to specify the guest's email ID or phone number. After submitting these details, click Resend
Note that you'll not be charged extra for resending the tickets.
Now, let's move ahead to detail how you can validate these tickets.
5. Validate tickets
To validate tickets, you need to follow these steps:
a. Download the Ticket Validator app (Google Play, App Store). Upon scanning with this app, you can know which ticket is genuine.

b. Go to the Manage Event section and click on Add/Edit Coordinator. Here, you can specify the respective email addresses. The coordinators will then receive an email invitation, which will have their login credentials for Ticket Validator.
Once they login, they can then scan the concert ticket and spot the invalid, valid, and the duplicate one.
This way you can authenticate tickets quickly. Plus, it just takes a few seconds to scan the QR Code on the ticket and grant access. Hence, you no longer need to keep your audience waiting in long queues.
And with such a smooth entry procedure, you will also be able to keep the crowd under control.
6. Track attendance
Using this app, you can also track the performance of your event. That is, you can get analytical data based on the following parameters:
- Percentage of people who attended the event
- Number of tickets validated per coordinator
- Attendance on the different time periods (by hours, days) of the event
- Number of used, new, expired, and invalid tickets
- Number of duplicate and re-entry allowed tickets
The data will give you useful insights and lead you to make better decisions for your next concert.
So, by using Ticket Generator, you can authenticate and manage the crowd to your concert feasibly. Besides, you can get reports on event efficiency and performance.
Now, as you become ready to generate tickets for your concert, there are some things, which you need to keep in mind for best results in event management. So, now let' s move ahead to state some of the best practices, which will help you manage the crowd efficiently.
B. Crowd Management: Best Practices
Concerts are generally marked by stampede and mayhem. People end up losing their belongings, getting squashed in the crowd, and getting injured.
And as a concert organizer, you would least want it to happen in your concert. So, in order to avoid these situations to some extent, you can follow these best practices:
1. Undergo a risk assessment
You need to be aware of all the risks involving your concert.
For example, you can be extra cautious and take tight security measures if you are inviting a controversial figure to your concert. Or if your concert is being organized any closer to a dangerous area (such as gangsters' dwellings and highways).
This activity will help you know the prominent threats facing your event. And lead you to take appropriate event security measures.
2. Have an estimate of the footfall
You should always know an estimate of how many people are expected to turn up at your concert. For example, you can get this idea from how many people actually marked interested on the event post you created on social media.
Another obvious parameter is getting an estimate of the number of tickets sold for the concert.
By knowing the footfall, you can take crowd control measures accordingly. For example, you can employ crowd control barricades.

This will demarcate the area and restrict people from going beyond.
3. Keep multiple entry access points
By keeping entry access at different stops, you can keep the crowd entry under control. This practice will ensure that there is no large crowd at a single entry gate. This way, you can avoid stampedes and also endless audience queues at the entry.
Furthermore, you can specify different zones in your concert VIP(gold), silver, and normal entry. For example, concerts, which take place in colleges provide VIP access to students of the same college. This keeps the crowd separated and helps in proper control
4. Form multiple emergency exit points
Keep visible multiple emergency exit points. This way, event attendees will know where they have to go at the time of crisis.
Moreover, when you learn how to make your own concert tickets, you can segregate different zones in your concert such as VIP(gold), silver, and normal entry.

And, if the exit gates are marked and clearly communicated, the crowd will not panic during an emergency. And this will reduce the chance of crowd crush or stampede.
Follow these best practices to keep your crowd under control.
So, now that you know how to make your own concert tickets and manage the crowd, it's time to choose your concert ticket generator for smooth and authentic entries. Make your concert a safer and more enjoyable experience for your audience.


.gif)


