

Free Seating Chart Maker: How to Build a Seating Plan Without Paying for Software
 Written byAshish ChandraLast updatedSeptember 15, 2026
Key Takeaways: A free seating chart maker is any tool that maps your venue and assigns seats at no upfront cost. Most free options stop at the diagram: they show the layout but never put a real seat on a real ticket. The hidden cost is the manual work of matching guests to seats on the day of the event. Ticket Generator lets you start for free and turn your seating chart into assigned-seat tickets, each with a unique QR code.
I have set up seating for everything from 80-seat theatre nights to 4,000-person conferences, and the same question comes up every time: is there a free seating chart maker that actually works? The honest answer is yes and no.
Did You Know? About 58% of online event ticketing transactions now happen on a mobile device (2025). Source: Mordor Intelligence.
A free seating chart maker is any tool that lets you lay out your venue and assign seats without paying upfront. That includes spreadsheets, design apps like Canva, generic online diagram tools, and the free tiers of ticketing platforms. Any of them can draw you a chart. The problem is that a drawing is not a working system.
Here is what I mean. A picture of your room tells you seat 14A exists. It does not tell the guest in 14A that the seat is theirs, stop two people from claiming it, or let you check them in at the door in two seconds. That gap is where most free tools quietly hand you a pile of manual work.
In this guide I will walk through what a free seating chart maker really is, the best free options and where each one breaks, what "free" actually costs you on event day, and how to build a chart that connects to real, scannable tickets. If you want the broader view first, our full guide to a seating chart maker for events covers the paid and free options side by side.
What is a free seating chart maker?
A free seating chart maker is a tool that lets you build a visual map of your venue and assign guests to specific seats without paying for the software. Some are pure design tools; others are ticketing platforms that include a seating feature on a free plan.
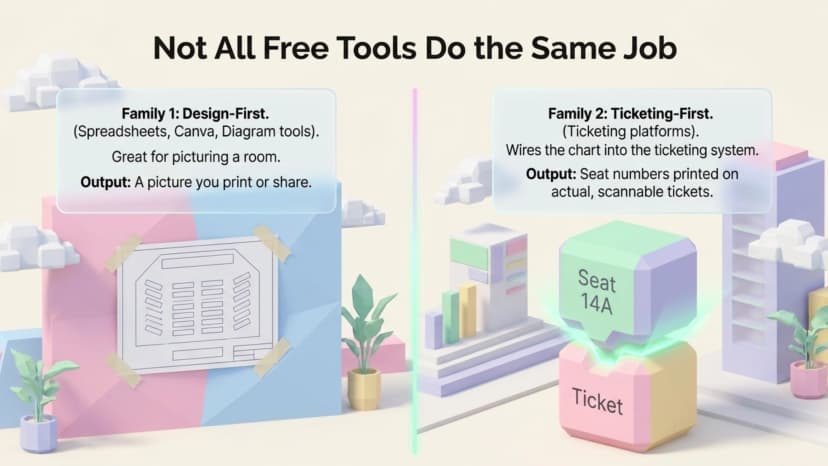
Free seating chart makers fall into two families, and knowing the difference saves you a lot of pain later.
The first family is design-first tools. These include spreadsheets, design apps like Canva, and any free online seating chart maker that outputs a diagram or image. They are great for picturing a room. What they produce is a picture you print, share, or tape to a wall.
The second family is ticketing-first tools. Here the chart is wired into your ticketing, so when a guest is placed in seat 14A, that seat number prints on their actual ticket. The chart is not just art. It drives seat assignment.
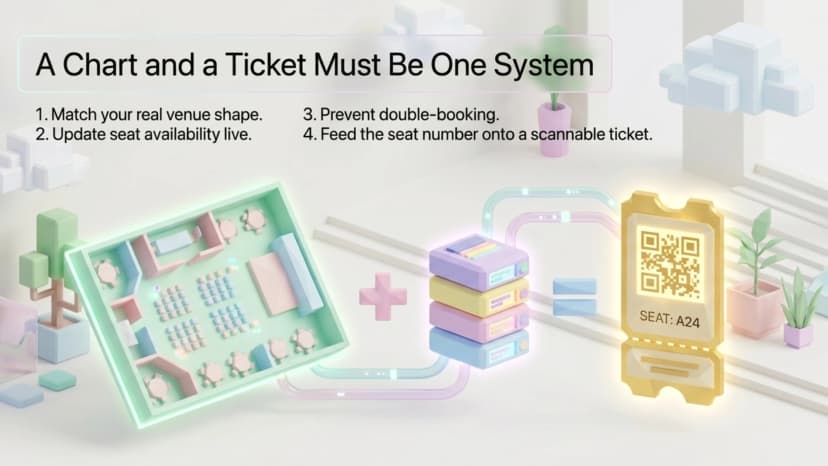
A genuinely useful seating chart tool, free or paid, should let you:
- Match the real shape of your venue, including rows, sections, and tables
- Mark seats as available, held, or booked, and update that live
- Tie each seat to a named guest so nobody double-books
- Feed the seat number onto a real ticket the guest can show at the door
Most free options nail the first point and ignore the rest.
What are your free options for making a seating chart?
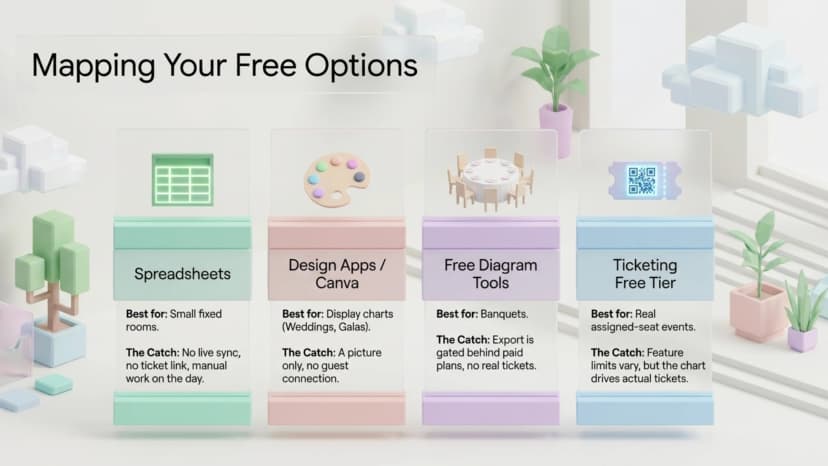
The most common free options are spreadsheets, design apps like Canva, dedicated free online diagram tools, and the free tiers of ticketing platforms. Each works for a different kind of event, and each has a clear ceiling.
Over the years I have watched organizers reach for the same four options again and again. Here is where each one shines and where it stops.
Spreadsheets (Google Sheets, Excel)
Free, familiar, and fine for a small fixed room. You colour cells to build a grid and type names in. The ceiling: no live updates for a team, easy to overwrite, and the chart never reaches the guest.
Design apps (Canva and similar)
These give you a clean, shareable free online seating chart that looks professional. Perfect for weddings and galas where the chart is a display piece. The ceiling: it is still a picture, with no link to who is actually coming or to any ticket.
Dedicated diagram tools
Several sites offer a free online seating chart maker built just for events, with drag-and-drop tables and chairs. Nicer than a spreadsheet for round-table layouts. The ceiling: most gate export, guest limits, or saving behind a paid plan, and again, no real tickets.
Ticketing platform free tiers
This is the only group where the chart connects to real seat assignment and check-in. Look for seating chart software free to start, where you only pay once you actually issue tickets. The ceiling: features and limits vary widely, so read what "free" really covers.
Here is how the four stack up:
|
Free option |
Best for |
The catch |
|---|---|---|
|
Spreadsheet (Google Sheets or Excel) |
Small fixed rooms and quick seating drafts |
No live sync, no ticket linkage, and everything stays manual on event day |
|
Design app (Canva) |
Weddings, galas, and presentation-quality seating charts |
Creates a visual layout only, with no guest assignments or ticket integration |
|
Free diagram tool |
Round-table and banquet layouts |
Saving or exporting is often restricted, and it still doesn't generate real tickets |
|
Ticketing platform free tier |
Real assigned-seat events |
Free limits vary by platform, but the seating chart is linked directly to attendee tickets |
Pro Tip: If your event needs assigned seats printed on each ticket, start with a tool that connects your seating chart directly to ticketing instead of one that only draws the layout. Ticket Generator lets you build a venue layout and assign seats that are automatically printed on every ticket, so there's no need to reconcile seating charts and tickets across multiple tools.
Want a seating chart that turns into real tickets instead of a printout? Try Ticket Generator and put every seat on a scannable ticket.
What does a "free" seating chart maker really cost you?
A free seating chart maker usually costs you time and control on event day, not money upfront. The bill arrives as manual matching, double-booked seats, and no fast way to check people in.
Free rarely means free. It means the cost moves from your card to your event day, and that is a worse trade than it looks.
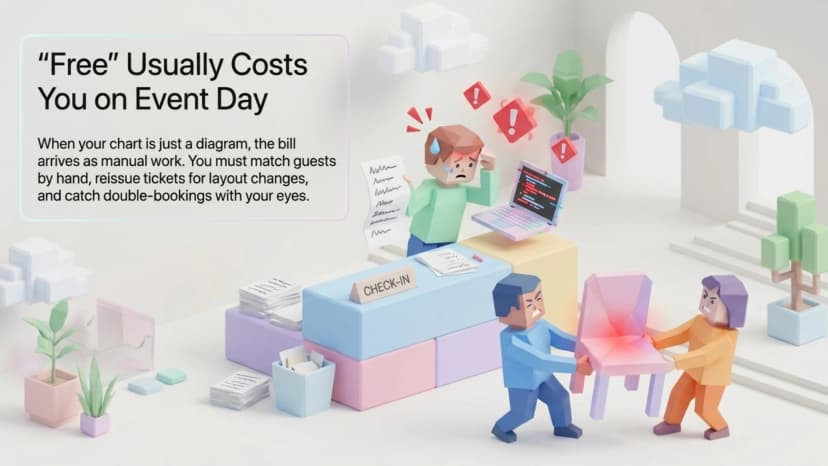
When your chart is just a diagram, you still have to do the real work by hand:
- Match each guest to a seat in a separate list
- Reissue and re-map when someone cancels or a group grows
- Tell guests their seat over email or at a check-in desk
- Catch two people holding the same seat with your eyes, not your software
I once watched a 300-person gala fall an hour behind because two volunteers were flipping between a printed chart and a paper guest list at the door. The chart was beautiful. It just could not check anyone in.
There is also a trust problem with generic tools. As Anshul Singh Bisht, Head of Event Technology at Ticket Generator, puts it:
"The most common mistake we see is organizers using a generic QR generator and realizing that this way every attendee will have the same code. Also, those generators can't help you stop duplicates."
The same logic applies to seating. A free diagram does not give each guest a unique, seat-specific ticket, so nothing stops a mix-up at the gate.
This is the moment most organizers realise a chart and a ticketing system are two different things. If you want to create a seating plan that holds up on the day, the two have to be joined.
How do you build a seating chart that connects to real tickets?
To build a seating chart that connects to real tickets, create your event, design a venue layout that matches your room, assign seats to guests, and issue each guest a ticket with their seat number and a unique QR code. The key is using one tool for both the chart and the ticket. Here is the workflow I use in Ticket Generator.
1. Create your event. Log in to your dashboard and start a new event, then add the basics: event name, date, start and end time, and venue. This is also where you choose how tickets reach people, because Ticket Generator gives you three launch modes:
- Direct Ticketing when your guest list is already set, so you generate and send tickets straight away.
- Free Registrations when you want people to sign up through a registration page and receive a free ticket automatically.
- Paid Registrations when you collect sign-ups and payment together, with tickets issued once payment clears through your own Stripe, PayPal, or Razorpay account.
For a seated event, Direct Ticketing is easiest when your list is locked. If seats are claimed as people respond, a registration mode lets each guest register and receive their seat in one flow.
2. Build your venue layout. Open the seating layout and recreate your room so the chart matches the real space. Add rows, sections, and tables the way they are physically arranged, set the seat count for each, and label everything the way guests will read it, so Row F, Section 2, and Table 9 all line up with your signage.
One pricing note to plan for: venue-layout events use two credits per ticket instead of the usual one, because each ticket now carries a mapped seat rather than a general-admission spot. Getting the layout right here is what makes every later step, from assignment to check-in, click into place.
3. Assign seats to guests. With the layout built, place each guest in a specific seat, or let each registrant choose their own as they sign up. Mark every seat as available, held, or booked, so the moment a seat is taken it is off the table for everyone else and nobody double-books.
Use holds for seats you want to keep back, like a front row reserved for VIPs, sponsors, or family, and release them later if plans change. Because the status updates live, a whole team working the same event sees the same picture, which is the one thing a shared spreadsheet cannot reliably give you.
4. Put the seat on the ticket. Now connect the seat to the ticket itself in the drag-and-drop designer. Start from a pre-built template or upload your own artwork, then drop in the variable fields that make each ticket unique:
- Guest name, so the ticket is clearly theirs.
- Seat number, row, and section, pulled straight from the layout you just built.
- A unique QR code and ticket ID, generated automatically for every single ticket.
You keep full branding control here, with your own colours and logo and no platform watermark. If you want to move faster, the AI ticket designer can build a full branded ticket from your event details, or you can edit a design in Canva and import it straight back.
Either way, the seat you assigned is now printed on the exact thing the guest carries to the door.
5. Distribute the tickets. Send each seat-specific ticket through whichever channel your guests actually use. Ticket Generator delivers by email in batches of up to 1,000 guests per send, by SMS, or by WhatsApp, and every email now includes a Digital Ticket link so guests can open their ticket straight from the inbox.
If the event is still weeks out, use Schedule Send to queue the whole batch for a set date, time, and time zone, and it goes out on its own with nothing left for you to do. You also get delivery tracking for what was sent, delivered, or bounced, plus a resend option so you can reissue to anyone who lost their ticket without touching the rest of the list.
6. Validate at the door. On event day, scan each QR code with the Ticket Validator app on any iOS or Android phone, or use the web validator at validate.ticket-generator.com. Each scan returns one of four clear results in about a second:
- Valid: the guest is in the right place and good to enter.
- Invalid or Expired: the ticket does not check out.
- Duplicate: someone is trying to reuse a seat that has already been scanned.
Because duplicate detection is built in, a copied or screenshotted ticket gets flagged the instant it hits the scanner. You can run several devices at once across multiple gates, and re-entry is supported for events where guests come and go.
One thing to plan for: the validator needs an internet connection to check tickets, so make sure your entry points have signal or Wi-Fi.
If you want to go deeper on the seating side, my guides on assigned seating for events and building an interactive seating chart walk through the finer details of laying out a room and letting guests choose their own seats.
Pro Tip: Because Ticket Generator keeps the chart, the tickets, and the check-in in one place, a canceled seat can be reassigned and reissued in minutes, and the old ticket stops scanning. No spreadsheet surgery required.
How Ticket Generator turns a free seating chart into real tickets?
Ticket Generator is built for organizers who want a seating chart that does real work, not just a diagram to print. You can start free with 10 credits on signup, enough to build a layout and test seat-specific tickets before you commit.
Here is how it fits an assigned-seat event:
- Venue layout builder. Recreate your room with rows, sections, and tables, then assign seats that map to real tickets.
- Tiered seating by category. Create multiple ticket categories, like VIP, General, or Early Bird, and price each one differently, so your best sections can carry a premium while back rows stay affordable.
- Seat-aware ticket design. Drop the seat number, row, and section onto each ticket as variable fields, with full branding and no platform watermark.
- Scannable Add-ons for premium seats. Attach perks like parking, dinner, or merchandise to a ticket, bundled into the price or offered as an upsell at checkout. Each Add-on gets its own scannable validation, so a VIP seat and its parking pass are both checked at the gate.
- Unique QR with duplicate detection. Each seat gets its own scannable code and ticket ID, so a copied or screenshotted ticket is flagged the instant it hits the scanner.
- Multi-channel delivery. Send seat-specific tickets by email, SMS, or WhatsApp, or schedule the whole batch with Schedule Send.
- Multi-gate check-in and live analytics. Scan across several gates at once with coordinator logins that only see their own event, watch attendance by seat and section in real time, then export it as Excel or PDF.
- Reusable layouts and one-click cloning. Build your venue map and ticket design once, then clone the whole event for your next show, so a recurring seating chart is never rebuilt from scratch.
- Enterprise-grade security. Ticket Generator is ISO 27001:2022 certified, GDPR-compliant, and SOC 2 aligned, which matters when you are handling guest data for a university, an awards night, or a corporate gala.
The proof is in the volume. Ticket Generator has powered more than 30,000 events and over 1,000,000 tickets across 100+ countries, including assigned-seat setups for universities, awards nights, and corporate galas. Heartland Emmys alone has run 10 or more ticketed events over four consecutive years on the platform.
On pricing, it stays predictable. You buy credits and only spend them when you generate tickets, with venue-layout tickets using two credits each. There is no commission on sales and no subscription, so a 200-seat theatre night costs the same whether the seats are $5 or $500.
The bottom line on free seating chart makers
A free seating chart maker is a genuinely useful starting point. If you are running a small fixed-seat room, or you just need a display chart for a wedding, a spreadsheet or a design app will do the job for zero dollars, and that is fine.
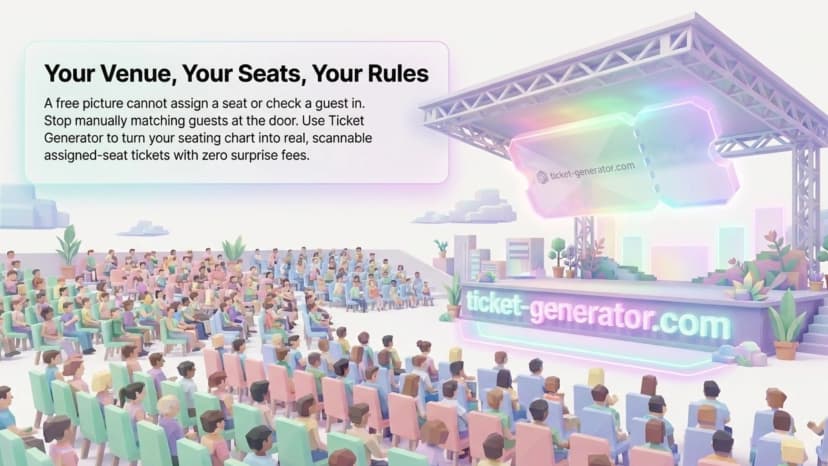
The catch shows up the moment your seats need to mean something at the door. A picture cannot assign a seat, stop a double-booking, or check a guest in. That work does not disappear when the tool is free. It just lands on you and your volunteers on event day.
The fix is not spending more. It is choosing a tool where the chart, the ticket, and the check-in are the same system. Then the seat you mapped is the seat the guest sits in, with no reconciliation required.
Try Ticket Generator to turn your seating chart into real, scannable, assigned-seat tickets. Your venue. Your seats. Your rules, with no commission and no surprise fees.
FAQs: Free Seating Chart Makers
Is there a truly free seating chart maker?
Yes, several tools let you build a seating chart for free, including spreadsheets, Canva, and the free tiers of ticketing platforms. The difference is what you get: most free tools output a diagram, while a few connect the chart to real seat assignment on tickets. Decide whether you need a picture or a working system before you pick.
What is the best free online seating chart maker for events?
The best free online seating chart maker depends on your event. For a display chart, Canva is hard to beat; for assigned seats that appear on tickets, a ticketing platform with a seating feature is the better call. Match the tool to whether the seat has to reach the guest.
Can I make a seating chart in Google Sheets or Canva?
Yes, both work well for building a visual seating chart at no cost. Google Sheets is handy for grid-style rooms, and Canva produces polished charts for weddings and galas. Neither one assigns seats to tickets, so you will still match guests to seats by hand.
Does free seating chart software connect to real tickets?
Usually not. Most seating chart software free tools stop at the diagram and leave ticketing to a separate system. To get the seat number onto a scannable ticket, use a platform like Ticket Generator that keeps the chart and the ticket in one place.
How does Ticket Generator handle assigned seating?
Ticket Generator lets you build a venue layout, assign each guest a seat, and print that seat number onto a ticket with a unique QR code. Venue-layout events use two credits per ticket, and every seat is validated at the door with duplicate detection. You start with 10 free credits, so you can test it before you scale.
About the author
Content Marketer at Ticket Generator
Ashish Chandra has spent 5+ years writing about event technology, covering topics such as ticket design, QR check-ins, attendee management, and event marketing strategy. As the Content Lead at Ticket Generator, Ashish has analyzed hundreds of real-world event workflows and ticketing setups, helping organizers across industries use QR-based tickets, event landing pages, and smarter ticketing systems to run smoother, better-attended events. His writing is shaped by real user needs and the questions organizers ask most often: How do I sell more tickets? How do I avoid chaos at the door? How do I make my next event better than my last? When he steps away from the screen, you'll likely find him hiking a quiet trail or tending his plants- his preferred way to reset.
Latest posts
Check out our latest articles on the blog
 12 min read
Email Marketing for Events and Webinars: What to Send, When to Send It, and How to Automate It
A step-by-step playbook for email marketing for events and webinars. Learn what to send, when to send it, and how to automate every email for in person and virtual events.
Ashish Chandra
18 Oct 2026
 10 min read
Halloween Masquerade Ball: How to Host a Night of Masks and Mystery
From Venetian-inspired masks to QR-coded entry, here is your complete guide to planning a Halloween masquerade ball your guests will talk about for years.
Ashish Chandra
18 Oct 2026
 9 min read
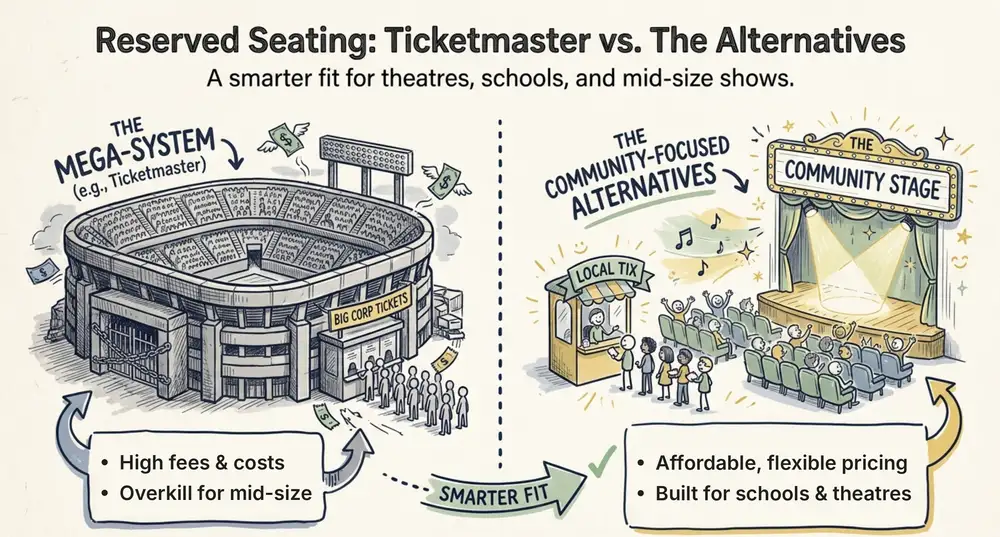
Ticketmaster Reserved Seating: How It Works and a Better Fit for Smaller Events
Ticketmaster reserved seating works well for arenas. If you run a theatre, gala, or mid-size show, see how it works, what it costs, and how to switch.
Ashish Chandra
16 Oct 2026